How to Edit the Business Name Caption on a 360 Image in Street View
Google Maps is one of the most widely used mapping services in the world, with millions of people relying on it every day to find their way around. For businesses, having a strong presence on Google Maps is essential for attracting customers and driving foot traffic. One of the key features of Google Maps is Street View, which allows users to explore and navigate through 360-degree panoramic images of streets and buildings.
If your business has a Google My Business listing, you can add 360 images to your profile to give potential customers a virtual tour of your space. However, it's important to ensure that these images are accurate and up-to-date, including the business name caption that appears at the bottom of each image. This caption should reflect your business's name or other relevant information, such as the type of business or location.
Fortunately, editing the business name caption on a 360 image in Street View is a simple process that can be done using the Google Maps App. In just a few easy steps, you can update the caption to ensure that it accurately reflects your business and helps attract more customers. In the following sections, we'll provide a detailed guide on how to do this.
Step 1: Open the Google Maps App
The Google Maps app is available for free on both Android and iOS devices. If you don't have it installed already, you can download it from the Google Play Store or the App Store. Once you've opened the app, make sure you're signed in to the Google account that's associated with your business's Google My Business listing.
Step 2: Open Photos
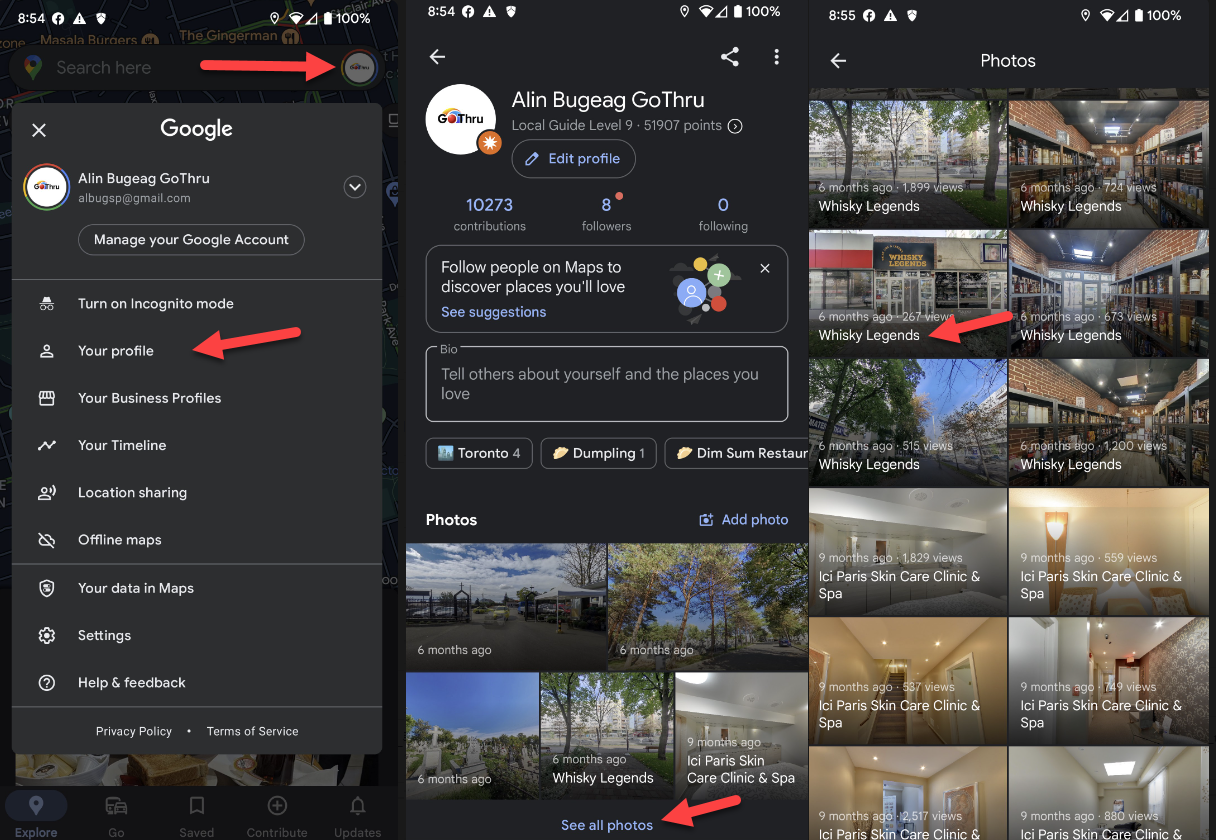
When you're in the Google Maps app, tap the "Menu" icon in the top left corner of the screen. From the dropdown menu, select "Your contributions". This will take you to a page where you can view and manage all of your contributions to Google Maps, including reviews, photos, and answers to questions. Tap on the "Photos" tab to see all the photos that are associated with your Google My Business account.
Step 3: Find the Photo You Want to Write a Caption On
Scroll through the list of photos until you find the 360 image that you want to add a caption to. If you have a lot of photos, you can use the search bar to filter them by date or location. Once you've found the photo, tap on it to open it.
Step 4: Enter the Desired Caption
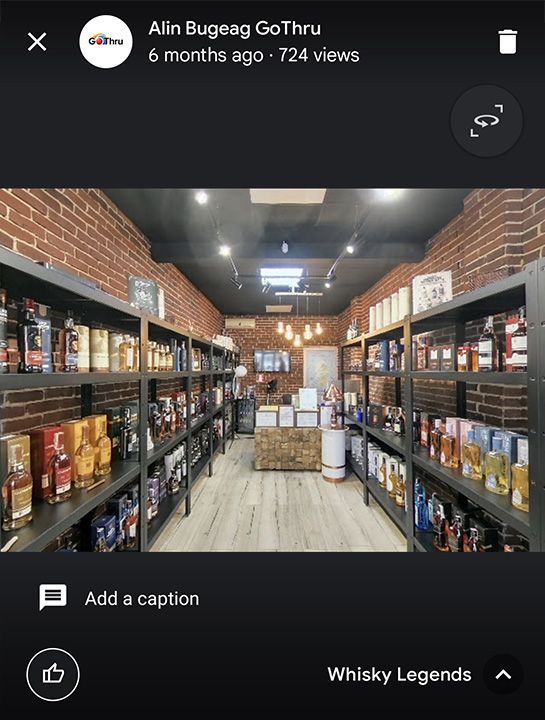
In the bottom right corner of the screen, you'll see an "Add a caption" input box. Tap on it and enter the new the caption for the photo. Keep in mind that the caption should accurately reflect your business's name or other relevant information. You can also add additional details, such as the type of business, location, or any other information that you think would be helpful for potential customers.
Step 5: Save
After you've entered the desired caption, tap on the "Send" button in the top right corner of the screen. This will save the changes that you've made to the photo. Note that it may take up to 24h's for the changes to appear on Google Maps.
Step 6: Check for Updates
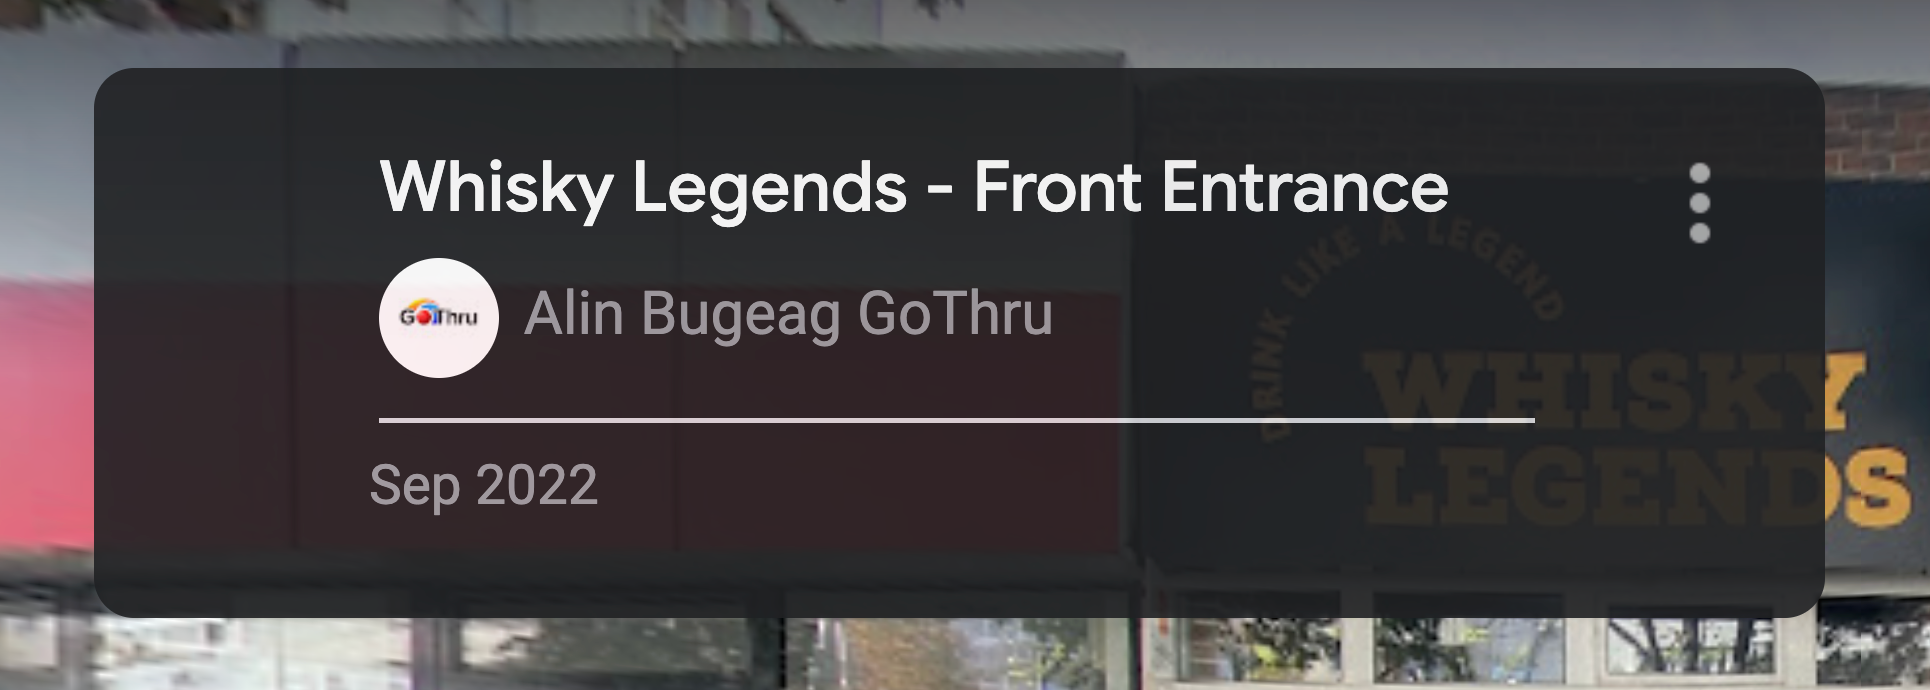
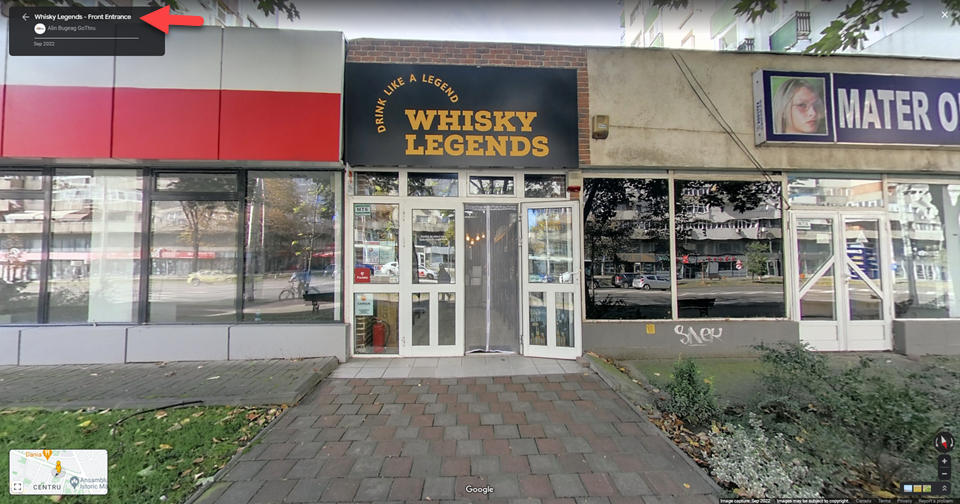
To see if the caption has been updated, go to your business's Google Maps listing and find the 360 image that you added the caption to. Click on the image to open it in full screen mode. You should see the updated caption in the attribution section. If the caption doesn't appear right away, give it some time and check back later.
By following these steps, you can easily edit the business name caption on a 360 image in Street View using the Google Maps App. This will help ensure that your business is accurately represented on Google Maps, which can improve your local SEO and make it easier for customers to find you online.